Gitkraken Client
Install GitKraken Client
To install GitKraken Client download the correct binary for your system.
Then follow the installation instructions provided on their website.
In the installation instructions you’ll see that you do not actually need to install Git separately to use GitKraken Client as it ships it’s own Git framework, NodeGit, which is primarily developed and maintained by members of the GitKraken development team. The reason we asked you to install git is that if you wanted to use git in another setting (through the command line, or integrations with VS Code or Rstudio) you would need git installed on your system. The principles of the workflow we’ll be showing you remain the same.
Integrating GitKraken Client with GitHub
In order to effectively work with GitHub repositories through GitKraken Client, you will need to enable the integration and authenticate with GitHub. You can then use GitKraken Client to define or generate an SSH key that authenticates git operations on GitHub through GitKraken Client. Follow the instructions on the GitKraken Client site to perform both steps.
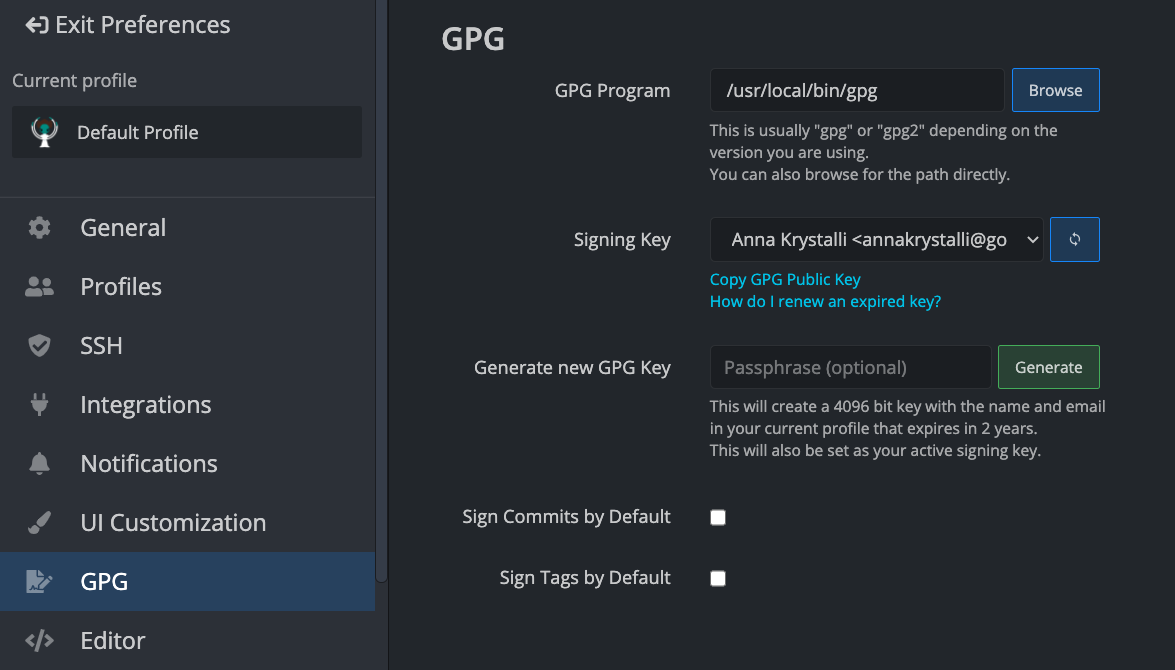
Turn off GPG
GPG adds another layer of trust to your commits by allowing you to digitally signing them. We’ll not explore this topic further in this workshop so please check your GPG settings under preferences and ensure the "Sign Commits by Default" and "Sign Tags by Default" options are unchecked.

If you want to set GPG signing up in GitKraken Client, have a look at the documentation on Commit Signing with GPG.